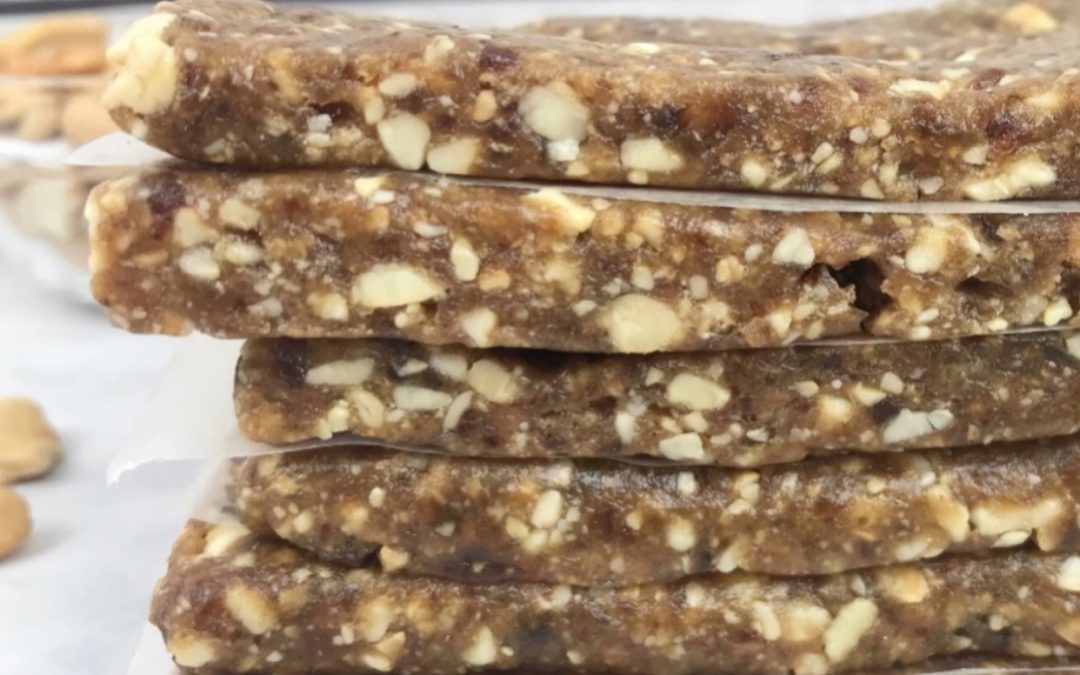
These homemade fruit and nut bars were inspired by my love for the cashew-cookie flavored LaraBar. They are the perfect snack to take with you on a hike or bike ride or to satisfy a mid-day sweet tooth.
Disclosure: This post contains some affiliate links. If you click on the link and make a purchase, I may earn a commission. You can review my full disclosure policy here.
You may not have heard of them, but Lara Bars® are a popular fruit and nut nutrition bar, and for good reason. Not only do they taste great, they are also made with a very short list of ingredient, and they do not require an oven. That means they are super easy to make. As a registered dietitian that promotes whole foods for health, this bar gets an A in my book.
As with most store-bought bars, there is one downside – the cost. One Lara Bar® will run you anywhere from ~$1.75- $2.00, or more. That cost can add up quickly, especially if you’re someone who eats them regularly.
This is where all of my recommendations come together. I encourage everyone to eat whole foods within the context of a balanced meal. Cooking at home and teaching your children to cook at home is important, too. I want your food to taste good and I want you to plan ahead so you have healthy snacks ready to grab. You can have all of these things and some extra money, by making fruit and nut bars at home.
How To Make Homemade Lara-like Fruit and Nut Bars
Making your own fruit and nut bars is about as easy as cooking can get. It really isn’t even cooking; it’s more like food assembly. All you need is a food processor and a few ingredients. I use the 14-cup Cuisinart Food Processor to combine the ingredients, and I absolutely love it! I’ve had the same one for over 5 years and it has never failed me! And if you know me, you know I use it daily to puree my son’s food.
There are so many variations of fruit and nut bars that you can make. LaraBar has a cashew-cookie flavored bar that I really like, so I tend to use cashew’s when making these. There are tons of delicious flavors though, so I suggest you get creative when making these for yourself. Select the dried fruits and nuts that you like best, and use the basic recipe to create your bar.
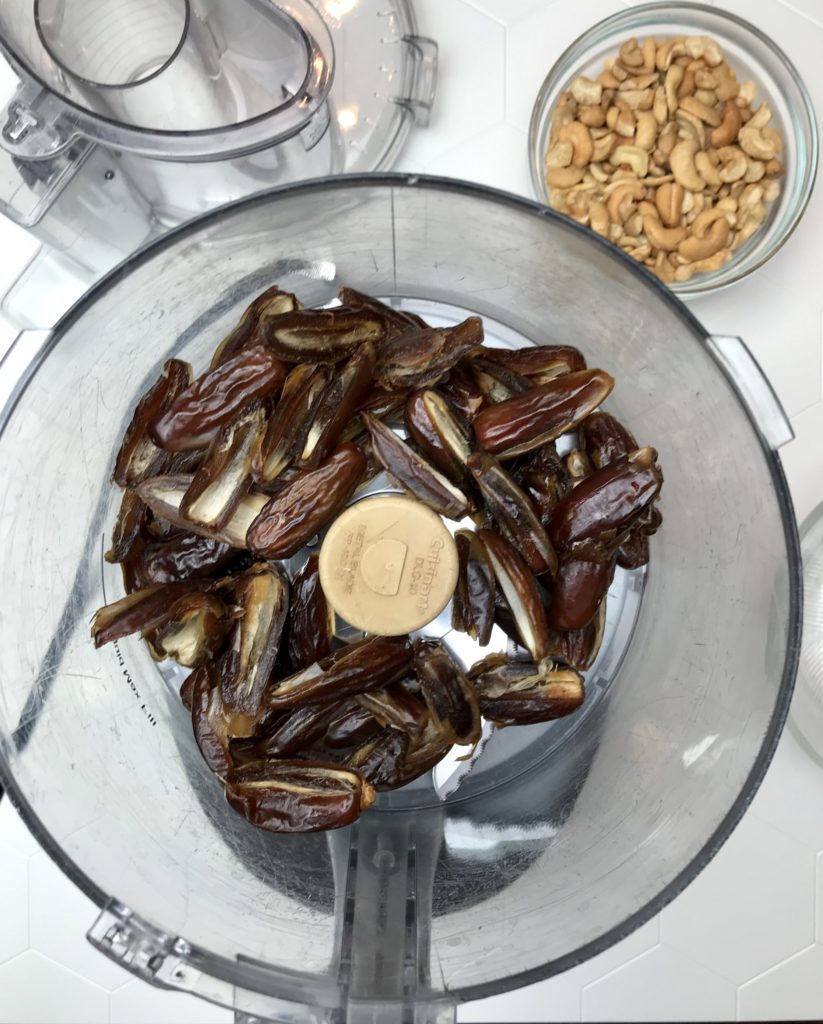
To make the cashew-cookie flavored bar, all you need ~1 cup of cashew pieces and 8 ounces of dried dates.
STEP #1
Put the dates in a food processor, and blend until it becomes a paste. Transfer the paste to a bowl.
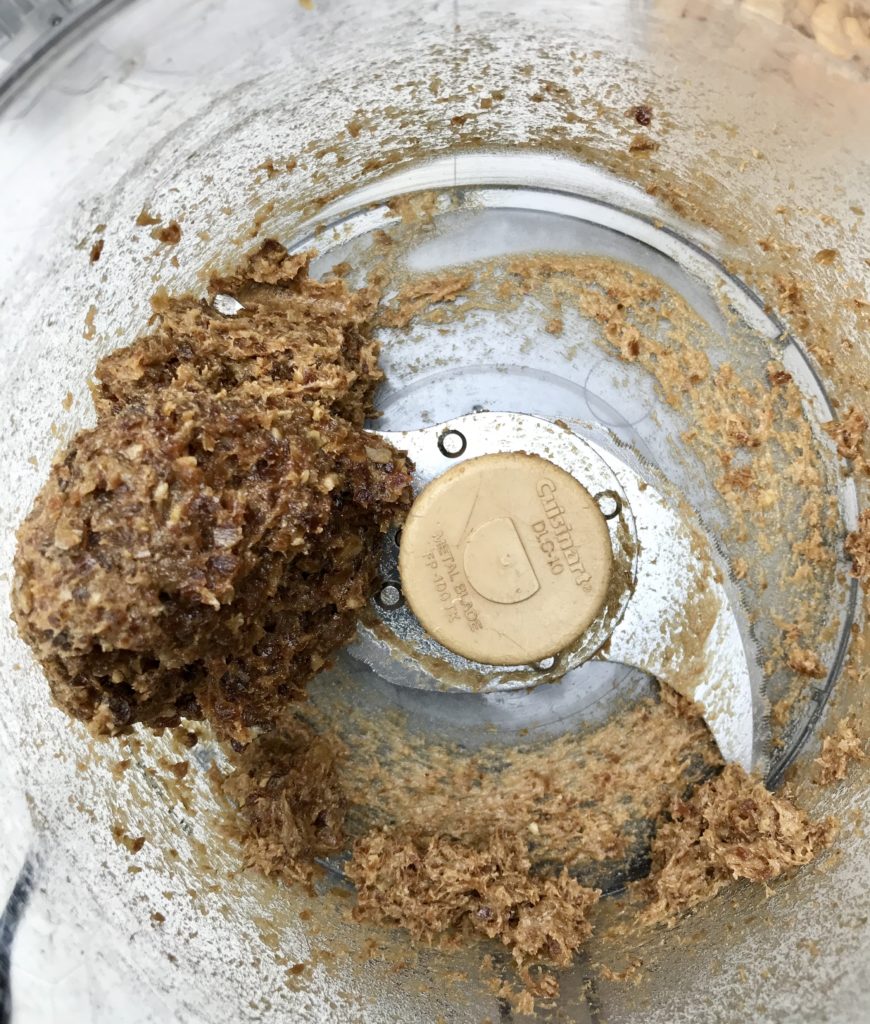
STEP #2
Put the cashews in a food processor and pulse until they are chopped very small (you do not want to over-blend or you will end up with cashew butter.
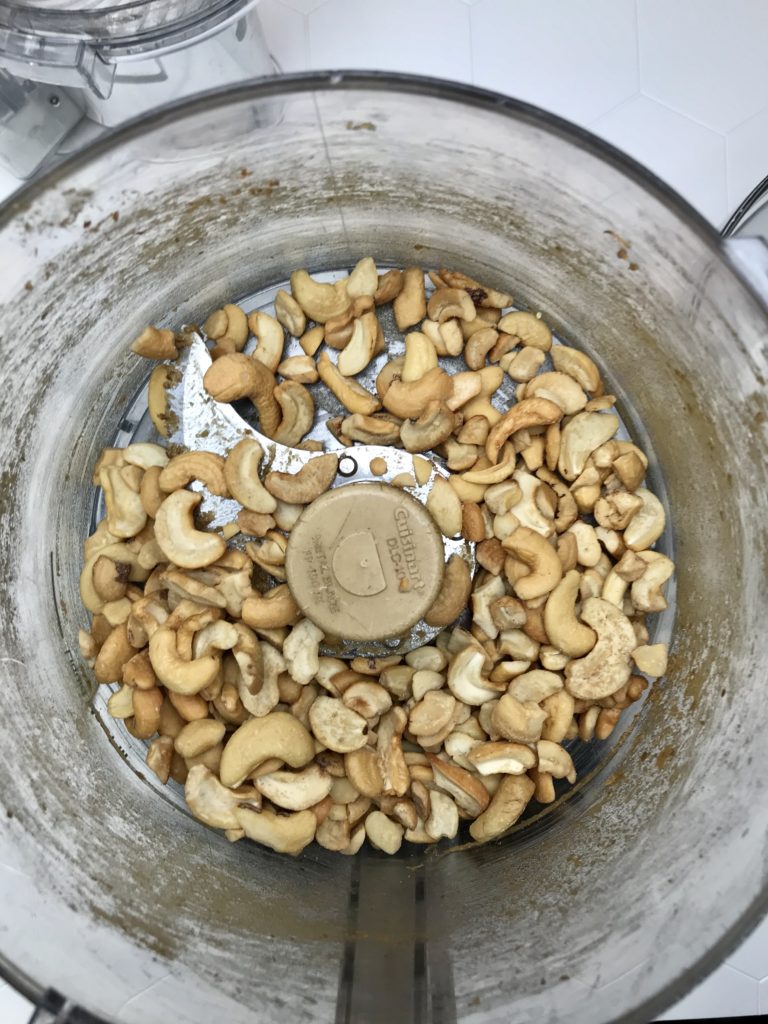
You want there to still be small pieces of nuts for some texture.
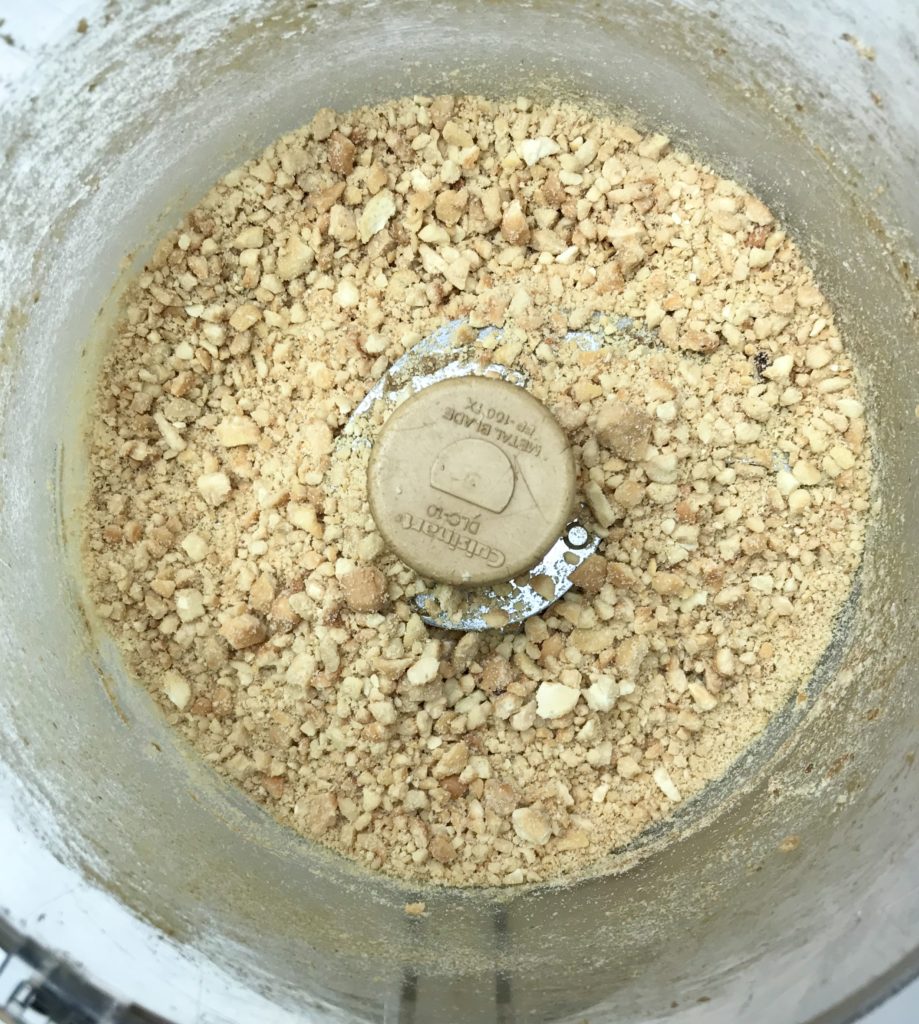
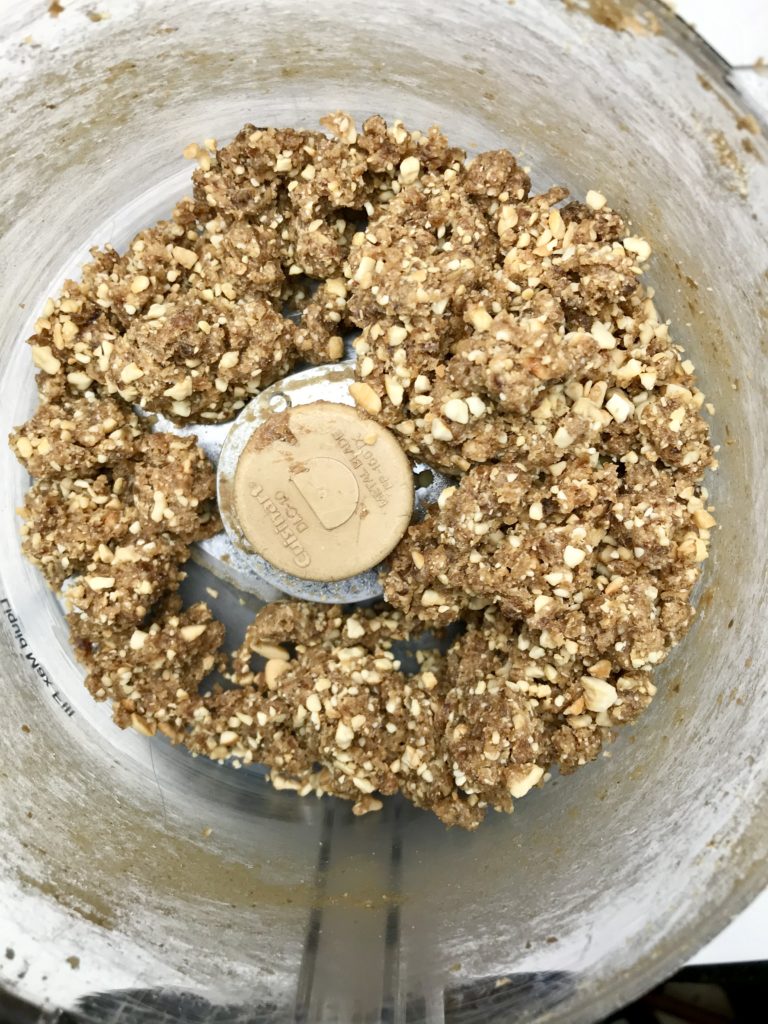
STEP #3
Add the nuts to the dates and pulse until they are blended. You can also do this in a bowl, using your fingers to blend them together.
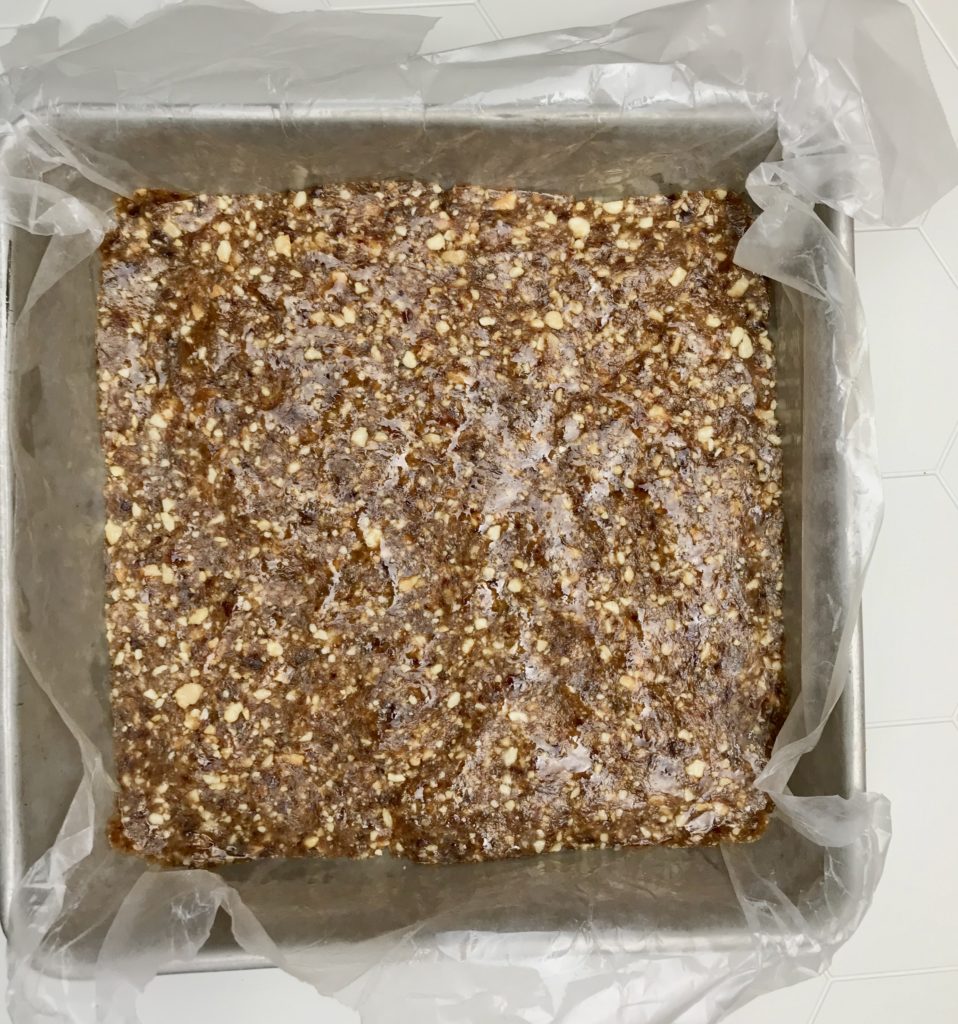
STEP #4
Line the bottom of an 8X8 pan with a piece of Parchment paper, then spread the mixture in the pan. Make sure to press firmly and evenly, so that each bar is the same size. Transfer to the refrigerate to harden for at least 30 minutes.
STEP #5
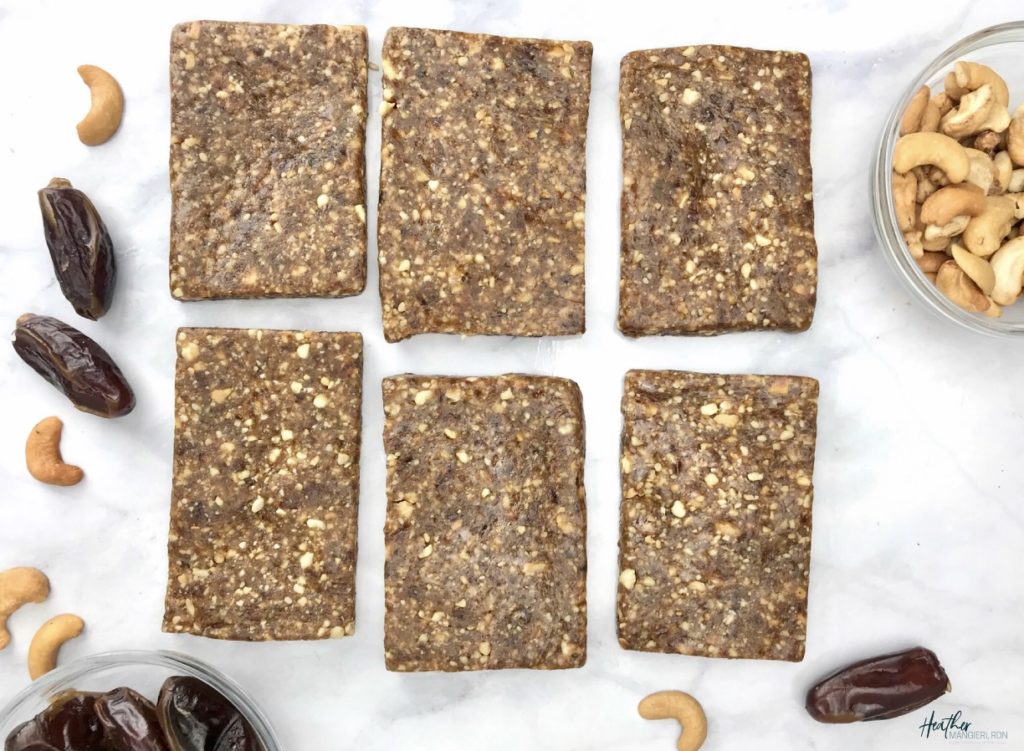
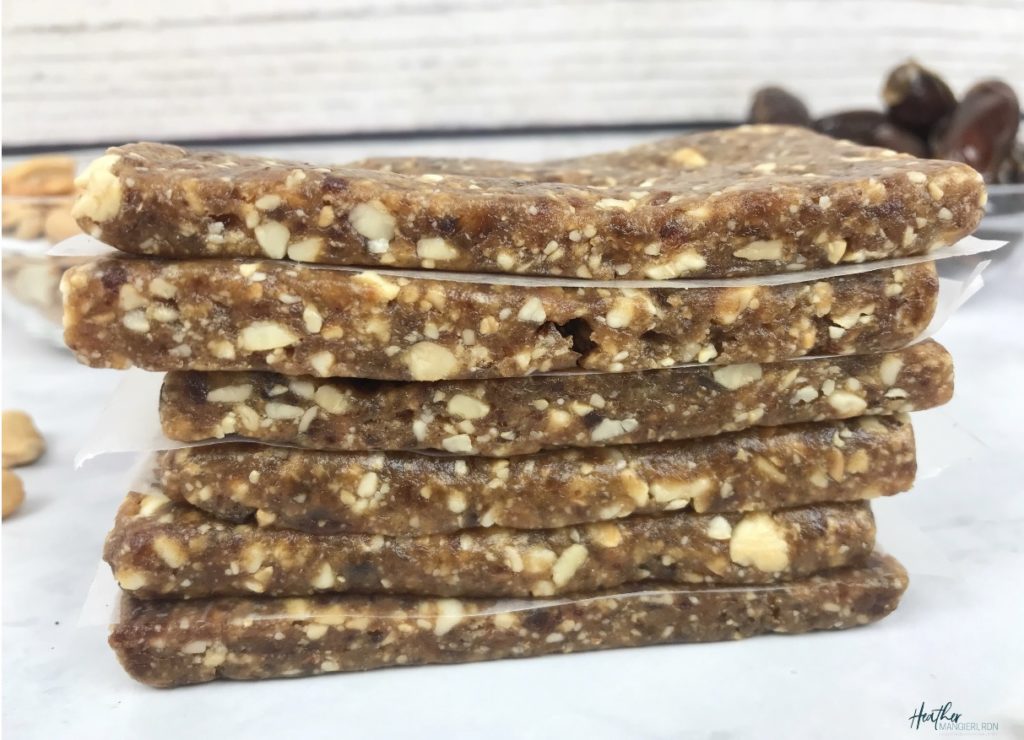
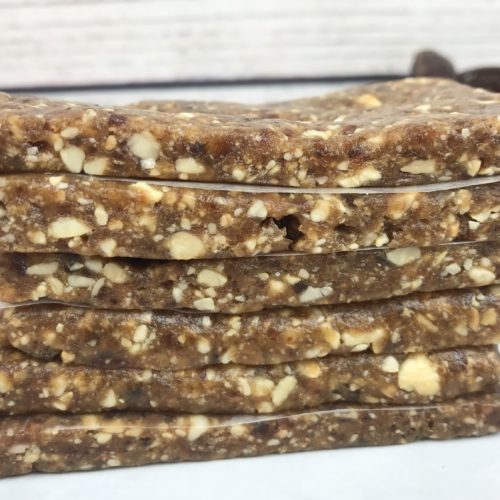
Using a sharp knife, cut into 6 even bars. Remove the bars one at a time, and place on a separate piece of Parchement paper. The bars will be sticky, so you’ll need to use your hands to form each one into a 3” X 1.5” bar. Once they are formed into bars, wrap each one individually in plastic wrap and store in the refrigerator.
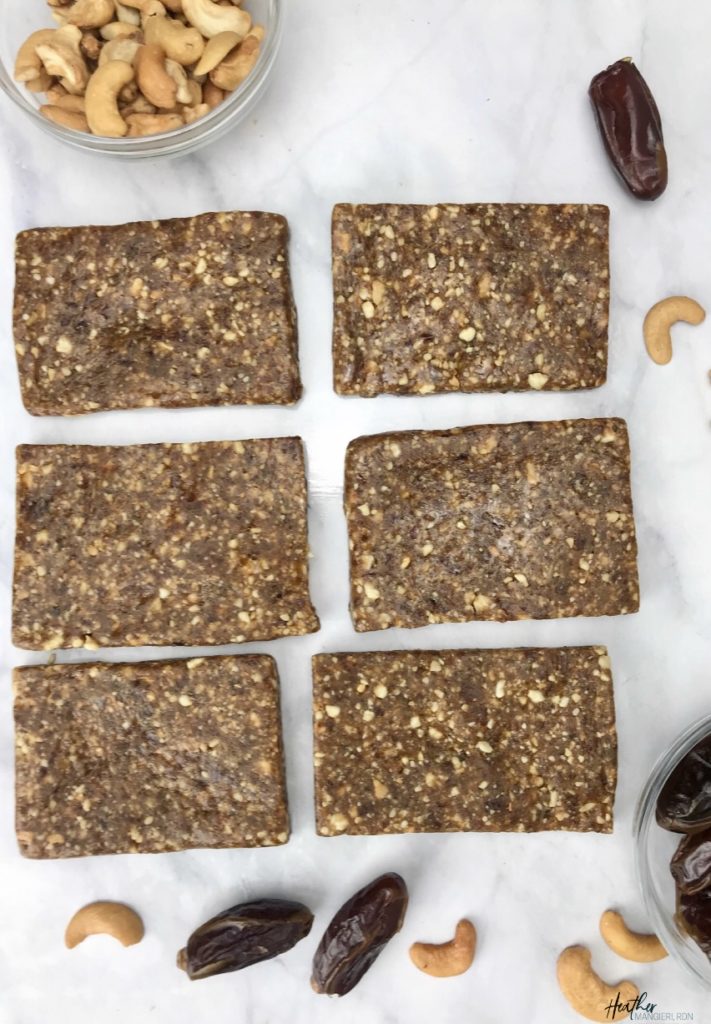
Makes 6 bars
It’s really that easy to make no-bake fruit and nut bars. They make a great portable snack that you can take with you hiking or cycling. And, no chocolate means you don’t have to worry about them melting.
Give them a try, and let me know what you think!
Homemade Lara-like Fruit & Nut Bar – Cashew Cookie Flavor
Ingredients
- 1 cup cashews, salted halves or pieces
- 32 each dates (~240 grams)
Instructions
- Put the dates in a food processor, and blend until it becomes a paste. Transfer the paste to a bowl.
- Put the cashews in a food processor and pulse until they are chopped very small (you do not want to over-blend or you will end up with cashew butter. You want there to still be small pieces of nuts for some texture.
- Add the nuts to the dates and use your fingers to blend them together. You can also combine them in the food processor and pulse a few times until they are combined.
- Line the bottom of an 8X8 pan with a piece of Parchment paper, then spread the mixture in the pan. Make sure to press firmly and evenly, so that each bar is the same size. Transfer to the refrigerate to harden for at least 30 minutes
- Using a sharp knife, cut into 6 even bars. Remove the bars one at a time, and place on a separate piece of Parchment paper. The bars will be sticky, so you'll need to use your hands to form each one into a 3” X 1.5” bar. Once they are formed into bars, wrap each one individually in plastic wrap and store in the refrigerator.
Notes
- Recipe Makes: 6 bars
- Serving Size: 1 Bar
- Nutrition Facts (per bar): 240 calories, 38 g carbohydrates, 4 g fiber, 29 g sugar, 0 g added sugar, 10 g fat, 2 g saturated fat, 0 mg cholesterol, 5 g protein, 65 mg sodium, 10% DV iron.
- Meal Planning Serving Sizes: 2.5 CHO; 0.5 PRO; 2 FAT
DID YOU MAKE THIS RECIPE? Tag @heathermangieri on Instagram and hashtag it #HeatherMangieriNutrition to all recipes. Or, Pin it on Pinterest for later!
 Hi, I’m Heather – a registered dietitian, busy mom, consultant, adventure junkie and travel addict who has mastered living healthy on the go. My blog is where I share simple recipes and healthy living tips to help and inspire others to live their best life.